Monday 29 April 2013

Formatting SD Card with a Mac

Normally before I re-install Linux onto an SD Card for my Raspberry Pi I reformat the SD Card. This also has the added advantage of returning the SD Card to the state it was in before putting Linux on there, which allows me to use it for other things. Although this is an easy thing to do, it did take me a while to figure out how, so I thought it worth sharing.

So how to you reformat it using an Apple Mac?

First you need to load Disk Utility. To do this click on the Applications folder, and chose Utilities.


Within Utilities select Disk Utility.


Now plug the SD card you want to format into a USB SD Card reader and plug this into a USB port on the mac.

You should see this SD Card appear in the left hand window. Take care with the next step, as you could lose valuable data if you format the wrong thing! I normally tell by checking the size of the disk. My SD Card is 8GB, so it should be fairly obvious which one it is.

You need to Right Click on this disk in the left hand column, then select 'Erase', with the left button, from the menu which appears.


You now have the option to change the Format of the SD Card and to rename the card if you require. Leave the Format as MS-DOS (FAT). I usually leave the name as UNTITLED. 

Then click 'Erase...'


A warning window will appear asking if you want to erase the disk. This is the point of no return, only click 'Erase' if you are 100% sure this is the right disk.


In several seconds time you will have a fresh formatted SD Card, ready to use.

All that remains is to eject the SD Card. Right click on the UNTITLED disk icon on your desktop, and select 'Eject "UNTITLED"'.

Monday 22 April 2013

Python - Graphs With Multiple Data

We saw in a previous blog post that it is very simple to create a basic graph in Python. We had one set of data and in a few lines of code we turned it into a graph. What happens if we want to add several bits of data into the same graph?

Let us use the following data for the average weight (Kg) of boys and girls over their first 10 years.

years = [0,1,2,3,4,5,6,7,8,9,10]
weightBoys = [3.3,10.2,12.3,14.6,16.7,18.7,20.7,22.9,25.3,28.1,31.4]
weightGirls = [3.2,9.5,11.8,14.1,16.0,17.7,19.5,21.8,24.8,28.5,32.5]

It turns out that adding a second line to the graph is very simple.

Lets start with the code we wrote for the basic graph and look how we need to modify it to take several sets of data.

We want to recycle as much code as possible, as this is the most efficient way to program.

Previously we started with import pylab. We still need to import the pylab libraries, so lets keep that line as it is.


We then created a function called drawGraph(xData, yData). As this function takes x and y data and draws a graph from it, lets keep that the same for now.


For this excersise we have said we want to plot the age vs. weight for boys and girls over the first 10 years.
Looking at the previous labels we need to modify all three labels.
  • The title needs to be modified, as we are not just looking at boys weights.
  • The x label needs to be modified, as we are now looking at the first 10 years and not the first 24 months.
  • The y label needs to be modified as we will be using Kilograms (Kg) and not Pounds (lb) as our unit of weight.
So updating our labels to suit they should now look like this.


Now we need to input our data.
As we are looking at boys and girls over the first 10 years both boys and girls can use the same data in the x axis.
There is a list of weights for boys over the first 10 years, and a second list for girls over the same period.


The function drawGraph (xData, yData) expects the x data and the y data. So for boys we would have to say

drawGraph(years, weightBoys)


and for girls

drawGraph(years, weightGirls)


So lets now run that.

Now pressing F5 to save and run the program, what happens?

There only seems to be one piece of data in the graph.


Shut down the first graph, ah a second graph appears, its appeared once the first graph was shut down. Why was that?


Well look at the code in the function. We have pylab.show() as the last statement in the function. That statement is saying show the graph. However at this point the function has not seen the second piece of data.

So lets move the pylab.show() statement out of the function, and place it after the two drawGraph statements.


Pressing F5 should now save the graph and then redraw it.


Does that look a little more like what you were expecting?

The only problem is we cannot tell what the blue line represents and what the green line represents. Lets add in a legend to distinguish them.

Just before pylab.show() add

pylab.legend(["Boys","Girls"],loc="Upper Left")


This adds the Legend with Boys and Girls in the upper left hand corner. Your code should now look like this.


Now press F5 again to see your final plot.


Hopefully you are now confident plotting multiple sets of data onto a single graph.

Also remember that when programming things will not always go right first time. But think about what you are asking your program to do and it should point you to the fault.

Monday 15 April 2013

Python - Drawing Basic Graphs

Python is a great programming language for achieving things really quickly. One area where I think it is really useful is for drawing graphs. They say pictures say a thousand words, and a graph can easily represent your data very quickly. As it is so easy to draw a graph in Python, it would be a shame not to use this functionality.


I have used graphs generated in Python many times for displaying data in presentations and reports for work.

The first thing you need to do is to install pylab. This is a library which adds the graph functionality to python.

To do this either log directly into your Raspberry Pi and load LXTerminal from the desktop, or SSH into your Raspberry Pi, if you want to connect remotely. Type the following into the command line and press return.

sudo apt-get install python-numpy python-scipy python-matplotlib


This program is written for Python 2.7. To load Python 2.7 click on the IDLE icon on your Raspberry Pi desktop and not the IDLE 3 icon.


This will open the following window.


Click on File and then New Window and an empty text box should open. This is what you will type your program into.


The first line we will type is

import pylab


This imports the pylab libraries that we have just installed.

I will next write a function to draw the graph for me. You obviously don't have to write this as a function, but if you want to use this several times in a program, it makes good sense. Besides it's a great opportunity to practice writing a function!

The function is only 4 lines long, so I will show you the whole function first and explain each line afterwards. Remember the 2nd,3rd & 4th line are indented, so these should have a tab (4 spaces) before the text.

def drawGraph(xData, yData):
    pylab.figure(1)
    pylab.plot(xData, yData)
    pylab.show()

  • The first line creates the function, names it and tells the function what inputs it expects. In this case xData and yData.
  • The second line creates the graph window. If you omit this line then it defaults to figure(1). However its good practice for later to keep this in and not rely on the default.
  • The third line is telling the graph what data to plot. xData for the x axis and yData for the y axis.
  • The fourth line asks pylab to show the graph you have created.

Your program should look like.


Right that's the difficult bit done.

Now lets create some data to put into our graph. The data below is for the average weight of boys over their first 2 years since birth. Each set of data should only be on one line. If in doubt cut and paste the text into your program.

ageBoys = [0, 1, 2, 3, 4, 5, 6, 7, 8, 9, 10, 11, 12, 13, 14, 15, 16, 17, 18, 19, 20, 21, 22, 23, 24]
weightBoys = [7.16, 9.15, 10.91, 12.56, 14, 15.43, 16.53, 17.64, 18.74, 19.62, 20.28, 21.05, 22, 22.27, 22.82, 23.26, 23.7, 24.14, 24.58, 25.02, 25.35, 25.79, 26.12, 26.57, 28.4]


Note the graphic above only shows some of the data. Refer to the text for the complete set of data.

Finally lets call the function we created with the data we have just typed in

drawGraph (ageBoys, weightBoys)


Because our function is expecting xData first and then yData it will use ageBoys as xData and weightBoys as yData.

Pressing the F5 key will now save and run your program. When asked for a filename type in basicGraph.py

Do you see the following graph?


Perfect! Or is it? Now your graph looks good, but it is totally meaningless. You may know what the data represents but the people looking at your graph will not. Lets add in some labels.

So just above the two lines which have the age and weight data type the following.

pylab.title('Age vs. weight for an average boy')
pylab.xlabel('Age (Months)')
pylab.ylabel('Weight (lb)')

These are fairly self explanatory. They set the title, xlabel and ylabel in that order.


Press F5, do you see the difference?


I hope this has given you an introduction to basic graphs in Python, we will look at more complex graphs at a later date.

Monday 8 April 2013

Basic Python - Programming a Word Checker

When I was first learning Python I used to think up useful little programs to write in order to help me learn. I knew these programs were not going to change the world, but they allowed me to learn new concepts in Python, which one day might help change the world :-). One of the great benefits of Python is you can write a program, which is useful to you, very quickly. I always found it really satisfying to set myself a small program to write, and succeed in programming it. I also was amazed at how quickly I would write these small bits of software.

The way I learnt to program was by programming. I found reading books and the internet are great to solve specific problems, and for guidance. However the only way to learn to program is to sit down and actually program!

Once I had progressed from the 'Hello World!' stage, one of the first programs I wrote was a word checker. The idea behind the program is the software will ask the user to enter a word. The program will then check if this is a real word or not, by checking it against a dictionary. It will then report back whether there was a match in the dictionary or not.

It's a very simple program but it did introduce me to a few new concepts such as loading files and writing functions.

I thought I would not only share this program with you, but explain my thought process so you could have a look at how I approached it and end up with a program that you will hopefully find useful.

This program is written using Python 2.7. There are some differences between Python 2.7 and Python 3.0, and although these easy to overcome you will need to use Python 2.7 for this tutorial. The reason I use Python 2.7 is because I required certain libraries for some more advanced programming, which were not available for Python 3.0.


It is always worth breaking your program down into smaller chunks. Thinking about a program as a whole can be quite daunting. However when you break it down smaller into smaller sections, each section seems quite easy to do.

So how would I plan my word checker program? Mapping out my program I figured there are 4 stages to it.

  • Stage 1 - I need to be able to type in a word to check if its a real word.
  • Stage 2 - I then need to be able to open up a dictionary of real words to check against.
  • Stage 3 - I then need to compare my word with the words in the dictionary.
  • Stage 4 - If my word matches with a word in the dictionary I need to report this is successful. If it fails to match then I also need to report this back.

Ok now we know what we have to do lets get on with it!

To start programming in Python click on the IDLE icon on the desktop, ensure you don't click on the IDLE 3 Icon!


 This should open the following window.


Click on File and then New Window and an empty text box should open. This is what you will type your program into.


Stage 1 - Inputting a test word.

Right first things first, we need to be able to input a word. We also know that we are likely to use that word again, so lets ensure we store that word somehow so we can access it again in the future. Lets create a variable in which we will store our word, lets call this variable inputtedWord.

So we want to make the word equal to some input from the keyboard. Python allows us to do this easily with the raw_input command.

inputtedWord = raw_input ('Please input a word:').lower()


As you can see the command also allows us to enter some text to explain to the user what you are asking them to enter, in this case we have asked to 'Please input a word:',

Finally we finish with .lower() As computers differentiate between upper and lower text, lets make our life simple and work in lower case text only. This command converts whatever is typed into lowercase.

Before moving on lets test this to see if it works.

Under the line you have just inputted type

print inputtedWord


Now press F5 to run your program. Python will ask you to save your file at this stage, so call it WordChecker.py.


Click on OK.


Choose where you want to save your program, if you are unsure where to save it, click on Desktop.

In Filename type:

WordChecker.py


Then click on Save and the program should run.

Did the program work as expected? Great, now you can either delete this print line or put a # in front of it (This will turn the line red) to tell Python to ignore it. I often do little tests like this as I go along to ensure my code is working as intended.

Stage 2 - Getting a dictionary

The second thing we said we needed was to get a list of real words. To help with this I have a file called DictionaryE.txt. This is basically a list of words in a text file. You will need to download this and save it in the same folder as your WordChecker.py program.


Lets write this section as a function. A function is a piece of code which we can call whenever we need to. This was probably the first function I ever wrote!

So how do we write a function? The first thing we need to know is where should we write the function. Well as in real life you need to know how to do something before doing it, and Python works the same way. So we write our function at the top of the program.

The first line of the function is giving it its title, and letting the function know if you are passing any variables into it. For this function we are not, so there is nothing inside the brackets. So type

def getDictionary():

Note the colon after the brackets.

Did you download the file DictionaryE.txt which contains a whole list of words? We plan to use this as our dictionary. So the next line in the function is.

  dictionaryOpen = open('DictionaryE.txt','r')

Note there is a tab (4 spaces) before dictionaryOpen. Remember this whitespace is important for Python. It is an unusual thing for programming languages, and even people who are seasoned programmers find the whitespace a little odd to begin with. However after using it for a while it starts to make perfect sense!

So we have opened the DictionaryE file, and now we need to read the contents.

    dictionary = dictionaryOpen.read().split()

Again we are still in the function so the line needs to be indented as the line above.This line does two things:
  • It reads the file
  • It splits each word in the file into a list. This makes it easier for us to play around with later on.
We then want to close the file, so it's not left open.

  dictionaryOpen.close()

and then as we have gone to the effort of writing a function to determine the dictionary, lets return the dictionary we have found to the main program.

  return dictionary

Remember all the lines inside the function should have a tab (4 spaces) before you start typing.


Ok so that's our function written. We now need to call the function. We know our function returns the dictionary, so lets store whatever is returned from the getDictionary() function into a variable called dictionary.

So after the inputtedWord line type

dictionary = getDictionary()


Wow. Halfway through and we have only written 7 lines of code. Pretty impressive huh?

Stage 3 - Comparing words with dictionary.

Next we need to compare the word we have typed with the words in the dictionary. Wouldn't it be easy if we could just ask if the word we inputted is in the dictionary?

Well we can, see I told you python was easy! We can use a simple if statement to check this.

if inputtedWord in dictionary:


Now we have done the check, we can report if its a success or failure.

Stage 4 - Report Success / Failure

If it is True that the inputted word is in the dictionary, we can finish off our if statement, by asking python to act on the information.

Lets use a print statement to report back to the user if the word was in the dictionary.

Remember as we are in the if statement to have a tab (4 spaces) before our next line.

    print inputtedWord, "is a word"

This line prints whatever is stored in inputtedWord, which should be the word we typed in and then the text which is in speech marks. You can either use " " or ' ' for speechmarks.

But what if the inputted word is not in the dictionary? Well rather than say nothing we should report this back also. So lets finish off our if statement with an else statement. Anything that is not covered by the if statement is covered in the else statement.

else:
    print inputtedWord, "is not a word"

And that should be all we need so lets look at the full program.


There we go. All that remains is to run the program. To do this you need to press F5 which will save the file at the same time. Although I hope you have been saving as you go along.

I would just like to mention the whitespace or tabs before a line. It may look confusing at first, but it really does help you structure your program, and mean it is easier to read when you come back to your program after a few weeks or months.

Why not set yourselves the challenge of modifying this program a little? Perhaps you can create a cross word solver that takes a word with some blanks and returns all possible words. What about an anagram solver?

These are the two programs I tackled next. Don't worry if you struggle with these, as I will cover both of them in a future blog!

In the mean time keep practising!

Monday 1 April 2013

Installing MediaWiki on a Raspberry Pi

I cannot sing the praises of MediaWiki highly enough. For those who don't know, MediaWiki is the program which is used for Wikipedia. I introduced the company I work for to MediaWiki so they could use it as a repositry for all the information about projects, HR, Finance, IP etc. Basically anything which should be written down and referred to in the future is stored in the wiki.

As an experiment I installed MediaWiki on my Raspberry Pi. I was surprised how well it ran and thought I would share with you the installation process for this. That way you can have your own personal wiki to store information about your school, information about your projects, or even information about your Raspberry Pi. In short anything which you normally jot down can be stored in the wiki and easily retrieved...

Before we get onto the installation of MediaWiki its worth pointing out that you are installing a LAMP server onto your Raspberry Pi. So what does LAMP stand for? It stands for Linux, Apache, MySQL and PHP.
  • Linux, you should all be familiar with, I hope. :-)
  • Apache is a web server. You will be connecting to the wiki remotely, via a web browser,  from another machine.
  • MySQL is a database to store all the information from the wiki. 
  • PHP is a programming language used for web applications. 
Sometimes the P in LAMP stands for other programming languages such as Python or Perl. But in this case it stands for PHP.

OK enough talking on with it!

Installation

Most of the installation will be through the command line. You can do this directly through LXTerminal (the icon for this is on the Raspberry Pi desktop) or accessing your Raspberry Pi remotely via SSH.

sudo apt-get update


sudo apt-get install mediawiki


You will shortly be asked for a password for MySQL. It is a good idea to set a password at this time.


You are then asked to repeat your password. This ensures you have typed it in correctly.


Now you need to modify a file called apache.conf. This file is stored in the 'mediawiki' folder, which in turn, is inside the 'etc' folder. We can modify this using a text editor called nano through the command line. To do this type:

sudo nano /etc/mediawiki/apache.conf


We need to remove the # from the third line down so it changes from

#Alias /mediawiki /var/lib/mediawiki


to

Alias /mediawiki /var/lib/mediawiki


As we are doing this in the command line you need to move down to the start of the third line by pressing the down arrow on the keyboard twice. To delete the # press the delete key.

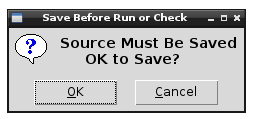
Now to save the file you need to press Ctrl-X (Press the control key and while holding this down, press the X key). A message will appear asking if you want to save the file.


Press Y and then return.

Great you have just modified your file using only the command line.

Next you need to install php-apc for object caching and Imagemagick for thumbnailing.

Lets do both these together shall we?

sudo apt-get install php-apc imagemagick


press Y when asked do you want to continue.

Dont worry if you find one of these has already been installed.

You now need to restart the apache server by typing.

sudo apache2ctl restart


For those of you who read the comments of my blog you will notice that something changed recently which meant these instructions stopped working. Thanks to some other excellent comments a fix was suggested. So we will quickly carry out that fix.

The first thing you need to do is to edit the apache2.conf file

sudo nano /etc/apache2/apache2.conf

Scroll to the bottom of this file and type

Include /etc/mediawiki/apache.conf

Press Ctrl-X to save, and type Y to agree to the changes.

Now you will need to restart the apache2 server by typing

sudo /etc/init.d/apache2 restart

That should fix any issue there was, so we can now continue as though there was never a problem! :-)

Right thats all we can do by SSH for now.

We now need access to the desktop on the Raspberry Pi. If you want to remotely access your Raspberry Pi desktop follow these instructions to VNC into the Raspberry Pi first. If you are directly connected, or have already connected via VNC, then the first thing you need to do is open your web browser.

When I first wrote this blog post the choice of default web browsers on the Raspberry Pi was poor, and you had to install Chromium to carry out the next stage. However the latest versions of Raspbian ship with Chromium already installed. Just be aware that there may be issues with some browsers when carrying out the next stages.

Open up the Chromium Web Browser and type the following web address into the address bar at the top.

http://localhost/mediawiki


Which should now take you to a web address with the following icon and information below it.


Click on the blue text below which says "set up the wiki"

The first screen asks you to select your language. If you are happy with the default options, then you can just click on Continue.


The next page shows that some Environmental Checks have been carried out.

Approximately halfway down the page you should see the following message.


There is nothing you need to type in this window, so you can click on continue at the bottom.


The next screen is titled Connect to database. There are 6 fields in this screen:

The first two options are Database type and Database host.

The top field labelled Database Type, should be left as default which is MySQL.
Next we have the Database host, leave this as localhost.


For Database name, I leave this as the default my_wiki, there is no real reason to change this.
Next we have the Database table prefix. Leave this blank.


Leave the Database username as root.
Which leaves only the last field on this page which you need to input something into, the Database password. Enter the password you entered at the beginning of the installation process when asked for the MySQL password.


Then click continue.


The next screen entitled Database Settings has three options, which should be left on the default settings.

Database account for web access, leave the Check box "Use the same account for installation" checked.
Storage Engine, the default InnoDB option should be used.
Database character set, again leave this as Binary.


Click on Continue


The next page is titled Name and is where you personalise the name of your wiki.

The top field is for the name of the wiki. You can enter what you want in here, but I will call mine TrevorWiki.
The second field is the Project namespace, leave this option as the default, which is Same as the wiki name.


The third line is for the wiki administrators name. I am going to put Wiki Admin in here.
The next two boxes are for your password. So enter the password into both boxes.
Enter your E-mail address in the next field if you want to. I tend to leave this blank.


Finally there is a box asking if you want to be asked more questions, or if you are bored and want to install the wiki. I opt for more questions, which is the default option.

If you are, as the options suggest, bored, then please feel free to choose the other option!

Then click Continue.


The Options screen. 

I leave the wiki as a Traditional wiki, which is the default option.


For Copyright and license, I leave this as the default option which is No license footer. 


For the E-mail settings, I leave all these as standard.


Extensions, I leave all these as standard.


Images and file uploads, I check the enable file uploads box (shown here unchecked).


Finally in the Advanced configuration. Select PHP object caching (APC, XCache or WinCache)


Then click on Continue

The next screen is titled Install. By clicking on Continue, you will begin the installation.


This might take a few minutes.

You should now see a window which shows all parts of the install is complete.


Click Continue.

You should now have a window which says Congratulations!


Very nearly there! Reading this message it states that you have generated a LocalSettings.php file. You now need to download it and put it in the base of your wiki installation (the same directory as index.php)

This file should have downloaded automatically, but if not you can click on the Download LocalSettings.php icon.

To move this file to the right place.

Via SSH type

sudo mv Downloads/LocalSettings.php /var/lib/mediawiki


At the moment the wiki is only displayed in text mode. You need to modify one line in the LocalSettings.php to rectify this.

To modify the LocalSettings.php file type the following into the command line.

sudo nano /var/lib/mediawiki/LocalSettings.php


Press the down arrow until you get to the line which says:

$wgServer = "http://localhost"

and comment this out by placing a # in front of it.

#$wgServer = "http://localhost"


Press Ctrl-X to save the changes

Press Y when asked if you want to save the modified buffer.

Press return when asked to save the file LocalSettings.php

Congratulations, you have now installed MediaWiki!

To access the MediaWiki server from another computer on your network. Load a web browser from a computer on your network, and type the following into the webbrowser

http://IPaddress/mediawiki/index.php/Main_Page


Replacing IPaddress with the IP address of the MediaWiki server. If you do not know what the IP address of your Raspberry Pi is you can find it by following this blog post on remotely finding your Raspberry Pi IP address. 

Watch out for future posts explaining more about MediaWiki!